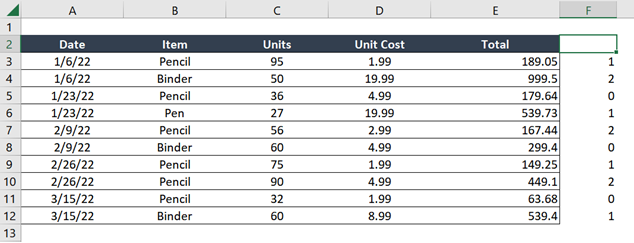
Data exported from a system are usually in a fixed report format. Sometimes though, it even includes unnecessary rows in between the data.
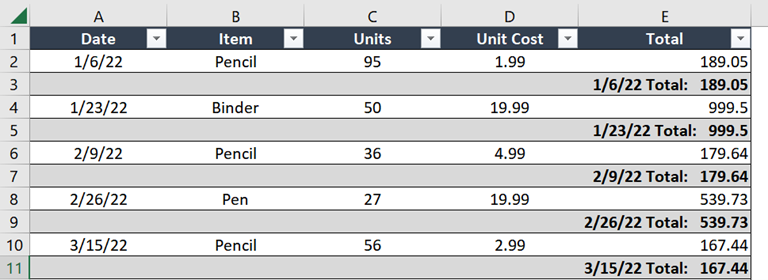
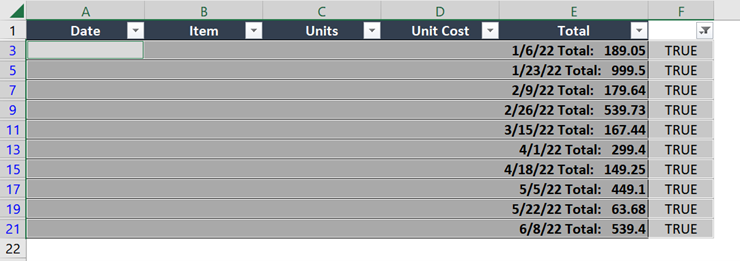
In my example below, notice that there’s a total row added between each record.
These rows may be helpful in certain instances. But if you intend to create charts from these data or maybe add formulas in your file to do some calculations, these rows can be bothersome.
You can manually delete these rows, but if you’re working on large datasets, that would be too much work.
In this tutorial, I’ll show you ways to mass delete every other (or every nth) row in Excel.
Before we start, please ensure that there is no other data next to the dataset. Otherwise, they may get deleted in the process. You may want to create a backup of the file first or copy the dataset onto an empty sheet.
Delete every other row in Excel by filtering odd or even rows
This method is perfect if you want to delete odd or even rows in your dataset.
1. On a new column next to the dataset, type the following formula:
| To get the odd rows: | =ISODD(ROW()) |
| To get the even rows: | =ISEVEN(ROW()) |
These formulas will return TRUE if the current row is odd or even (depending on the function you have used).
We want to mark the rows we will delete with TRUE, so be sure to add the right formula.

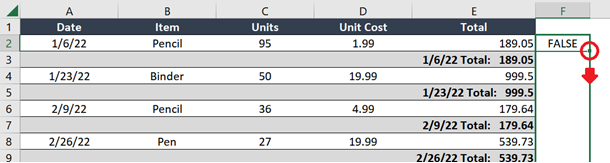
2. Drag the Fill Handler until you reach the last row in your dataset. Doing so will copy the formula to the remaining rows.
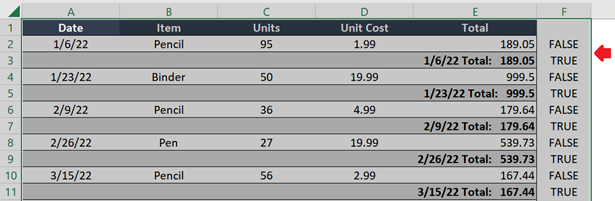
3. Once you have added all formulas, check if all the rows you intend to delete are marked as TRUE.
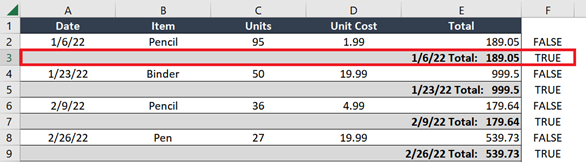
If you see that the “row markers” are correct, it’s time to filter the data.
4. Select all the cells within your dataset (including the header).
You can do so by selecting one cell in the dataset and pressing CTRL + A to select all.
5. Go to the Data tab and click on the Filter button under the Sort & Filter section.
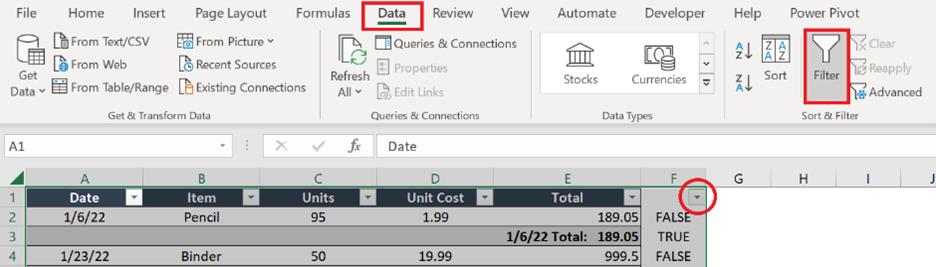
You should see the filter buttons added on the header row.
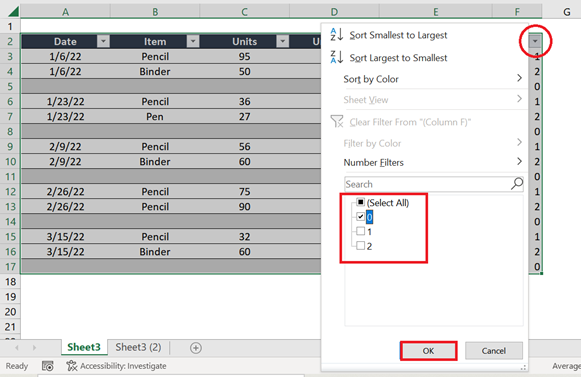
6. Click the filter button on top of the formula we have previously added, uncheck the FALSE option, and click OK.
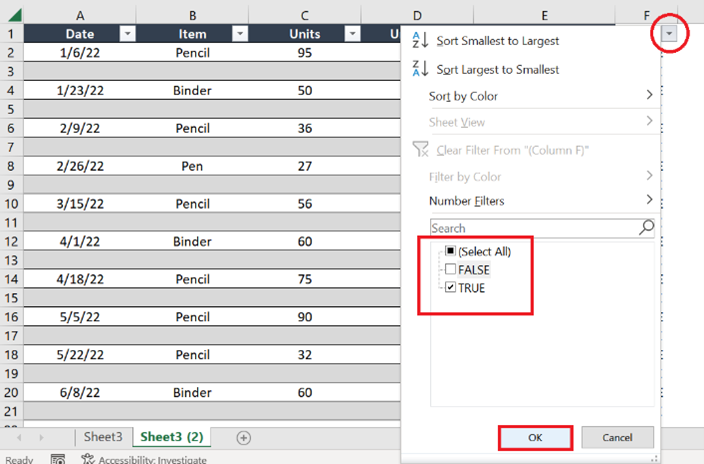
This will filter the records to only display rows marked as TRUE.
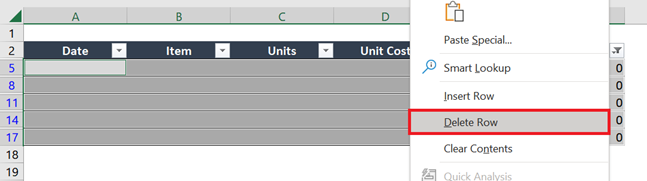
7. Highlight all the cells in your dataset that are marked as TRUE.
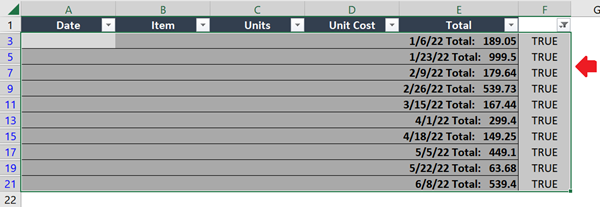
Remember not to include the header row.
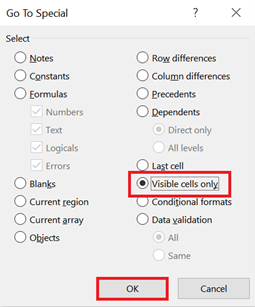
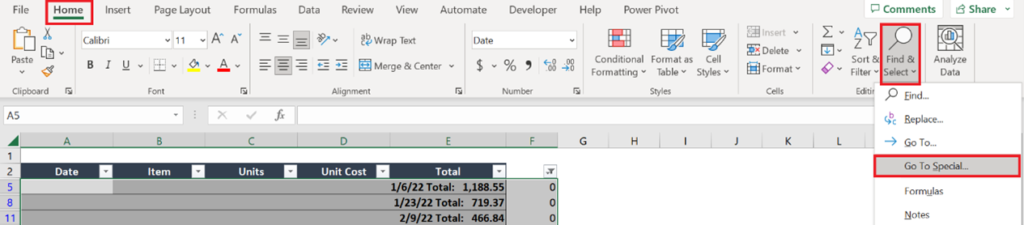
8. From the Home tab, click the Find & Select button and click Go To Special.

9. In the Go To Special menu, select ‘Visible cells only’ and click OK.
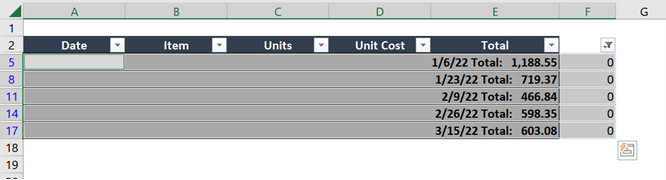
10. Notice that the rows in your dataset are now individually selected.
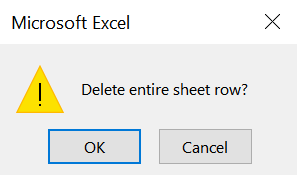
11. Right-click on one of these rows and select Delete Row.

12. A prompt will appear to confirm the process. Click OK to continue.
Remember that this action deletes the entire row, which means any data next to the dataset gets deleted.
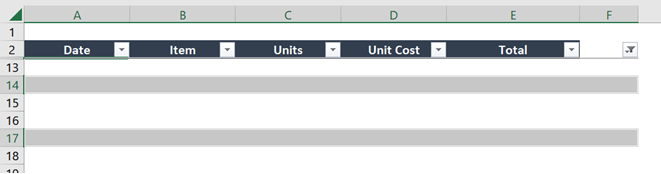
13. And that’s it! You have successfully removed all the selected rows.
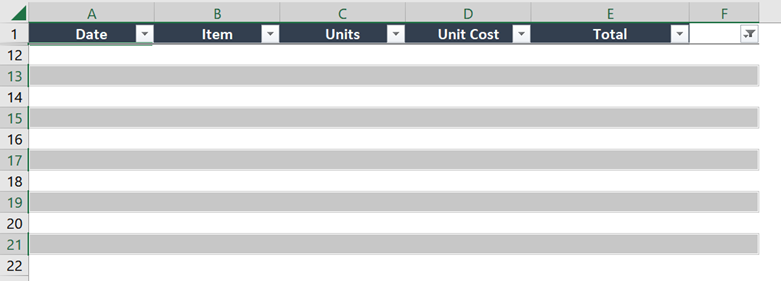
14. Let’s now remove the filters to view the dataset again.
From the Data tab, click on the Filter button.

15. You now have successfully deleted the odd or even rows from your dataset.
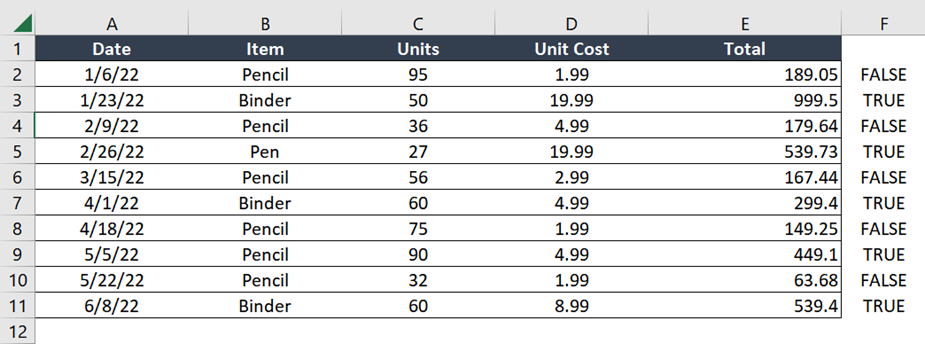
Remove the formulas you have added as “row markers” and you’re all set.
Delete every nth row in Excel by filtering the nth row
If you intend to delete every third, fourth, fifth, etc., row in your dataset, then this method is for you.
We are going to follow the same steps listed in the previous method, except that we will use a different formula to mark the rows we are going to delete.
- On a new column next to the dataset, type the following formula:
=MOD(ROW()-[header row],[nth row])- [header row] refers to the row where your header row is. If it’s in row 1, then type 1. Set this to 0 if your dataset doesn’t have a header.
- [nth row] refers to the nth row in the dataset you would like to delete. So, if you’d like to delete every 3rd row in your dataset, set this to 3.
Examples:
| =MOD(ROW()-1, 3) | This formula gets every third row in the dataset if the header row is in row 1. |
| =MOD(ROW()-2, 3) | This formula gets every third row in the dataset if the header row is in row 2. |
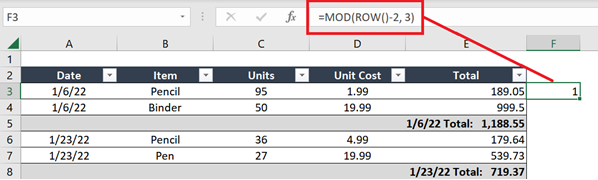
In case you don’t know, MOD() is a function in Excel that returns the remainder of the number divided by a number.
With the formula above, we are looking at marking the rows that we intend to delete with 0 (which means that the row is divisible to the nth row we have set).
2. Copy the formula to the remaining cells in the worksheet.
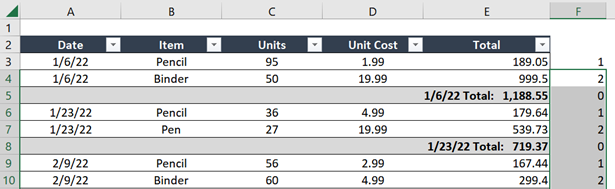
See if all the rows you intend to delete are marked with zero. If not, you may need to adjust the formula.
3. Select a cell within the dataset and press CTRL + A. Doing so will select all items in the dataset.
4. Go to the Data tab and click on the Filter button under the Sort & Filter section.
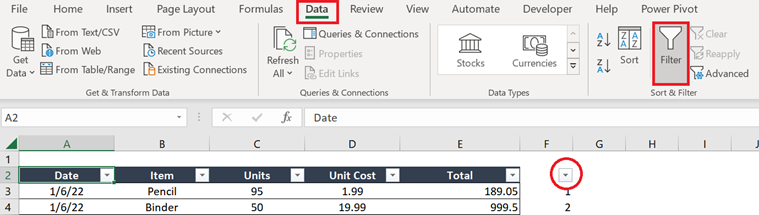
The filter buttons will appear on the header row of your dataset.
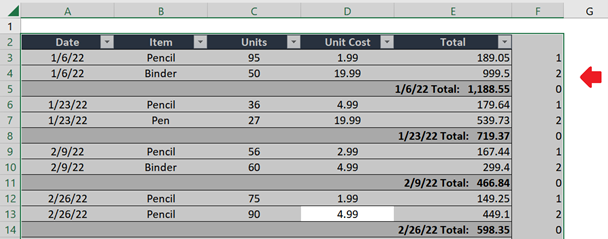
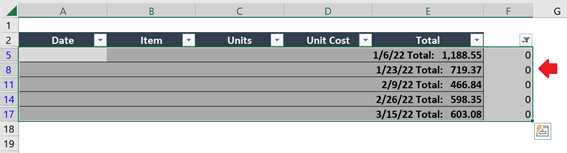
5. Click the filter button on top of the formula we have just added.
Adjust the filters so that only zero (0) appears in the dataset.
6. Once the filters are applied, highlight all visible rows in the dataset (those that are marked with 0). Remember not to include the header in the selection.
7. Go to the Home tab, click the Find & Select button, and click Go To Special.
8. In the Go To Special menu, select ‘Visible cells only’ and click OK.

9. The rows in your dataset should now be individually selected.
10. Right-click on one of these rows and select Delete Row.
11. A prompt will appear warning you that this action will delete the entire row. Click OK to continue.
12. And that’s it! The rows that you have selected are now deleted.
13. To view the dataset again, remove the filters by going to the Data tab and clicking on the Filter button.
14. You now have a “clean” dataset. Remove the formulas you’ve previously added, and you’re all set.
Related Tutorial: How to Delete Columns in Excel
Delete every other row in Excel using a VBA Code
If you regularly need to delete every other row in Excel, it may be best to have a macro do this for you.
1. While your Excel file is open, press ALT + F11. This should open the VBA Editor.
2. Go to the Insert menu and click on Module.

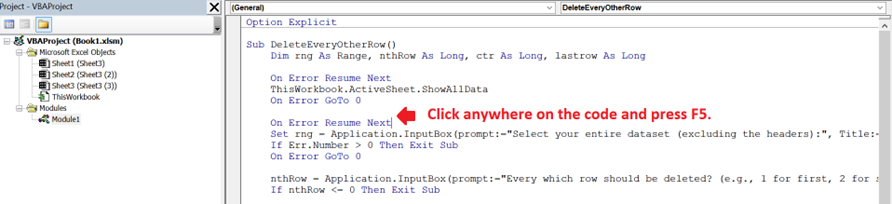
3. On the new module added, paste the following code:
Option Explicit

Sub DeleteEveryOtherRow()
    Dim rng As Range, nthRow As Long, ctr As Long, lastrow As Long

    On Error Resume Next
    ThisWorkbook.ActiveSheet.ShowAllData
    On Error GoTo 0

    On Error Resume Next
    Set rng = Application.InputBox(prompt:="Select your entire dataset (excluding the headers):", Title:="Range Selection", Type:=8)
    If Err.Number > 0 Then Exit Sub
    On Error GoTo 0

    nthRow = Application.InputBox(prompt:="Every which row should be deleted? (e.g., 1 for first, 2 for second)", Title:="Row to be Deleted", Type:=1)
    If nthRow <= 0 Then Exit Sub

    With ThisWorkbook.ActiveSheet
        lastrow = rng.Rows.Count
        nthRow = nthRow * -1

        For ctr = lastrow To 1 Step nthRow
            rng.Rows(ctr).Delete
        Next
    End With
End Sub
Now, it’s time to test the code. But before we do that, please create a backup of your dataset. Remember that changes done by a macro cannot be undone.
To run the code:
1. Click on any line on the code and press F5.
2. A prompt will appear asking you to select your entire dataset.
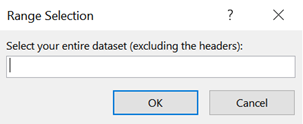
3. Go back to your workbook and select from your worksheet the range that contains your dataset.
IMPORTANT: The headers should not be included in your selection.
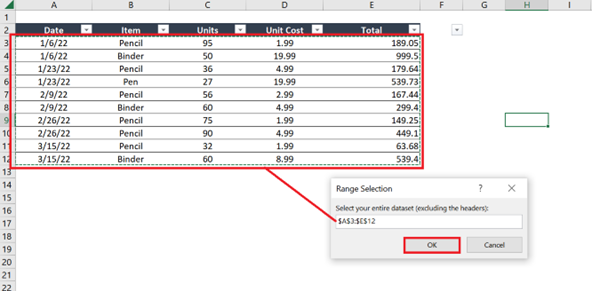
4. Once you have selected the entire dataset, click OK.
5. Another prompt will appear asking you to enter ‘every which row you would like to be deleted’.
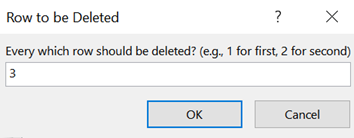
In my example above, I typed ‘3’ because I wanted to delete every third row in my dataset.
6. After typing your row number, click OK.
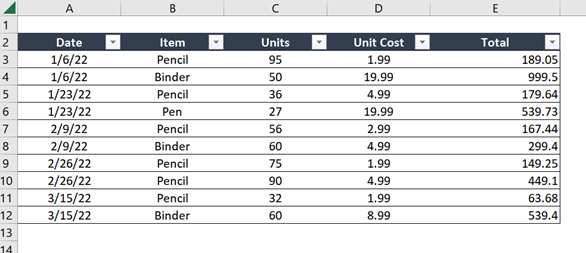
7. And that’s it! Every nth row in your dataset should now be deleted.
To reuse this code next time, remember to save the workbook in .xlsm or .xlsb format.
Also, for easier use, you may want to add a new button in your worksheet and link the button to the code that we have added. This way, you don’t need to open the code each time you want to run it.
Conclusion
As you can see, deleting every other row (or every nth row) is quite simple. You only need to add the correct formula for Excel to determine which row to delete. After that, you only need to filter the records based on these “row markers”, delete the visible rows, and you’re all set!
Related Tutorials:
Insert the Same Text in Every Other Row in Excel
How to Alternate Row Colors in Excel
How to Remove Blank Rows in Excel
How to Copy Row Height in Excel