We add passwords in an Excel file to restrict access and prevent unauthorized changes.
In this tutorial, I will go over the steps you can take to remove these passwords so you can access and make the necessary changes to your password-protected data.
Must Know:
For Mac Users: Know that Excel Mac has a 15-character password limit. You cannot open a file with a password that exceeds 15 characters. Ask a Windows user to open it and change the password to a maximum of 15 characters.
Table of Contents
Remove a password:
1. From an Excel File
1. When you open a password-encrypted file, you will see a form pop-up asking for the password (as shown below).
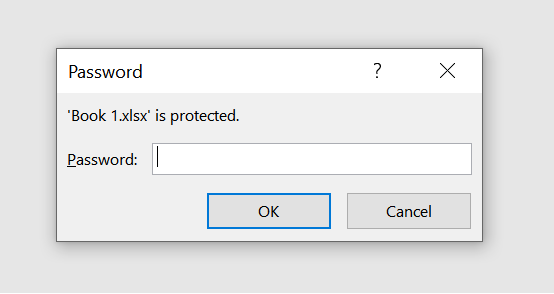
2. Type in the correct password and click OK.
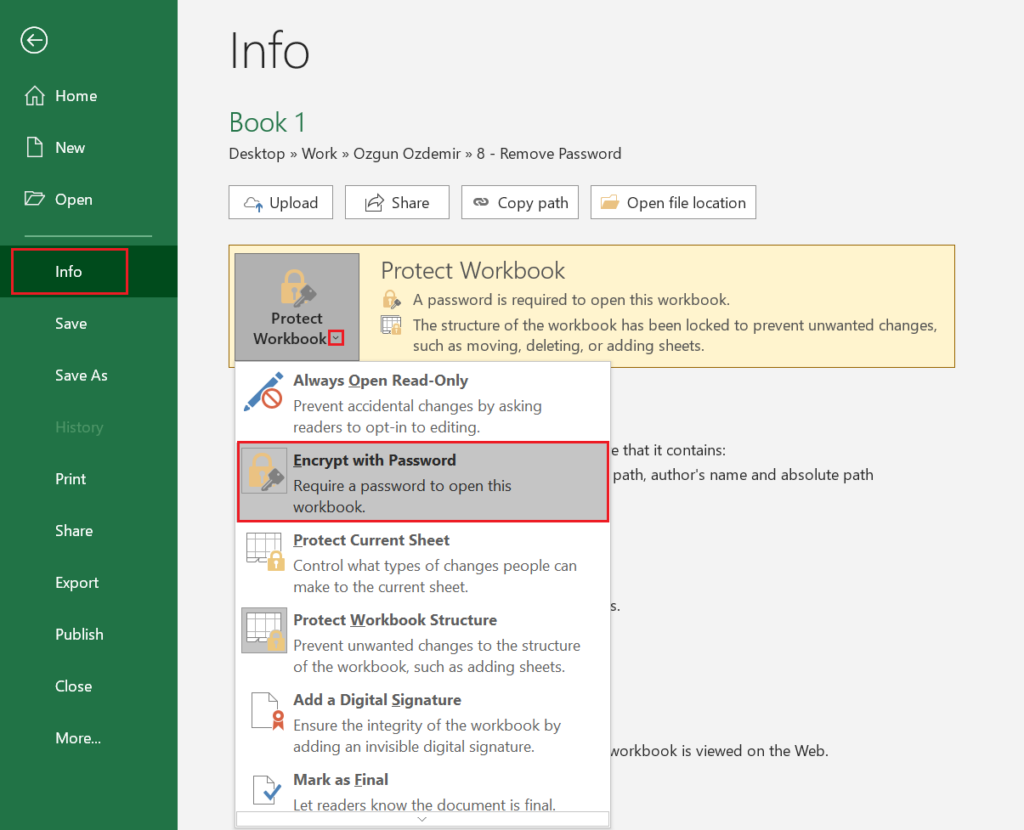
3. After opening it, go to File >> Info >> Protect Workbook.
Select the small down arrow next to the Protect Workbook option.
From the list of selections that appears, select Encrypt with Password.
4. The Encrypt Document pop-up menu will appear. Highlight the current password and press DEL.
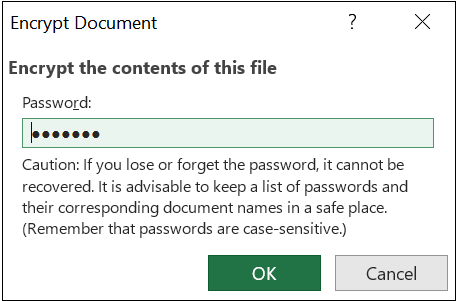
Once you’ve cleared the password textbox, click OK.
And that’s it! Your Excel file is no longer password-encrypted.
To test it, save your changes, close the file and open it again.
2. From a Workbook
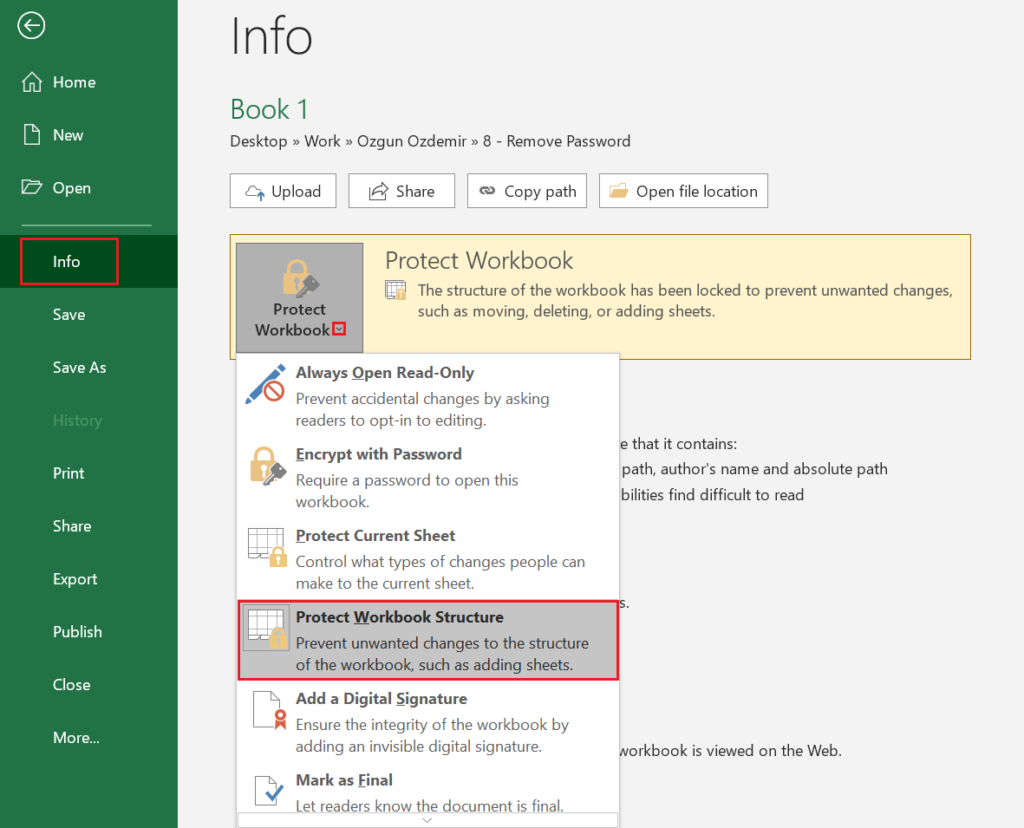
1. Go to File >> Info >> Protect Workbook.
2. Select the small down arrow next to the Protect Workbook option.
Select Protect Workbook Structure from the list of options that appear.
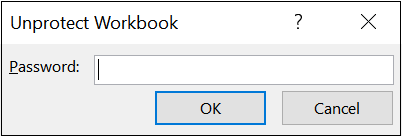
3. The Unprotect Workbook pop-up menu will appear.
Type in the correct password and click OK.
And that’s it. You have removed the password in a Workbook.
You can now add/edit/rename/delete the sheets inside it.
After making the necessary changes, if you want to re-add the password, follow the same steps specified above.
You could also do the following shortcut.

Go to Review and select Protect Workbook.
Type in the password, and voila! The workbook is again password-encrypted.
3. From Individual Worksheets (with a password)
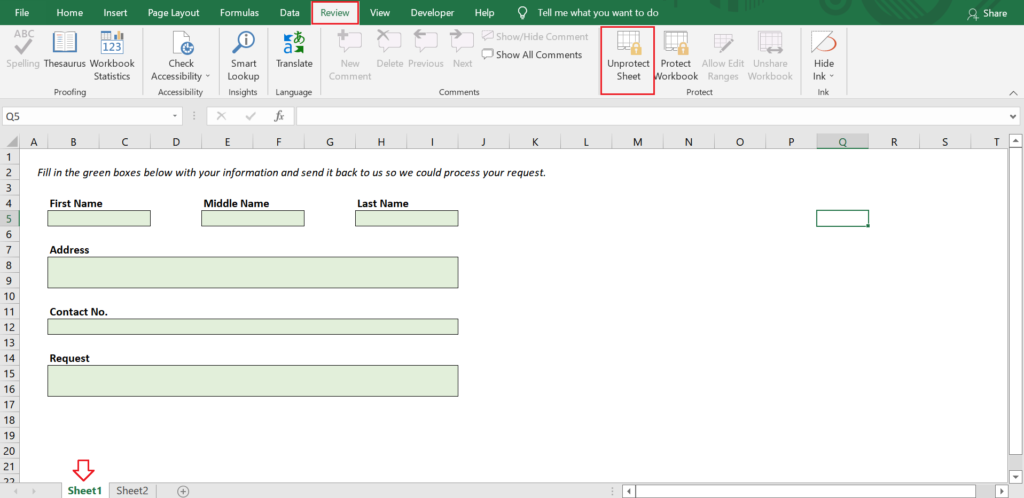
1. Select the worksheet that you would like to edit.
2. Go to Review and select Unprotect Sheet.
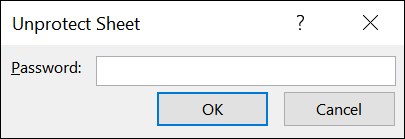
3. The Unprotect Sheet pop-up menu will appear.
Type in the correct password and click OK.
After that, the current worksheet no longer has a password; therefore, you can start making the necessary changes.
If you want to re-add the password after making the changes, follow the same steps mentioned above.
If you want to unlock more cells that you like to be available for edits even without a password, follow the steps below. (Remember to do them before adding the password again.)
How to unlock cells for edits?
1. Select the cell(s) that you would like to unlock.
To select multiple cells, hold on to the CTRL key while clicking on the cells.
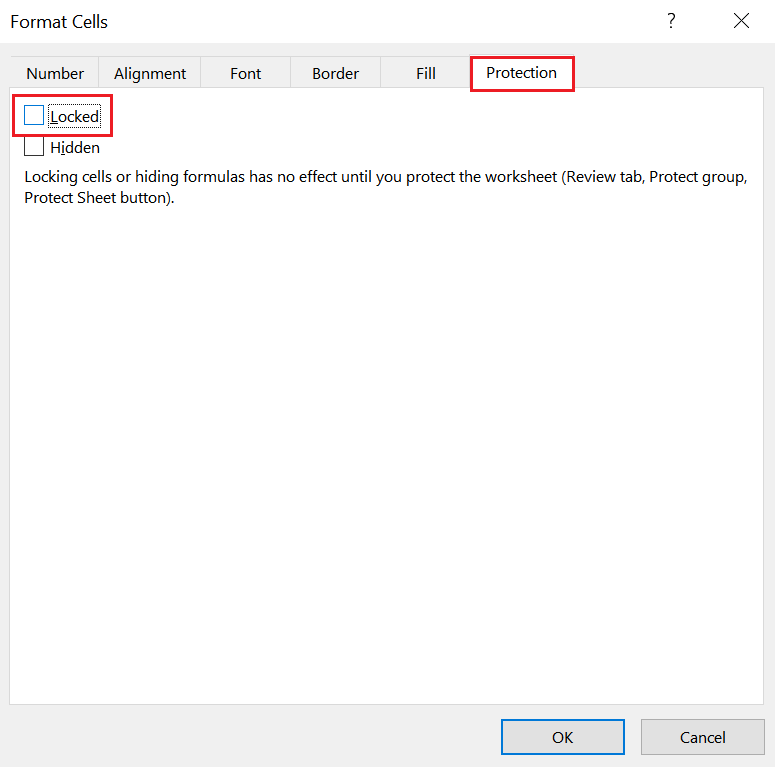
2. Press CTRL + 1. The Format Cells menu will appear.
3. Go to the Protection tab. Uncheck the Locked checkbox and click OK.
4. That’s it. You have successfully unlocked the selected cells for editing.
You can now re-add the password to the worksheet to prevent changes in locked cells.
4. From Individual Worksheets (without knowing the password)
If you have forgotten or lost the password in your worksheet, don’t worry. There is a workaround for this.
DISCLAIMER:
This tutorial assumes that you are authorized to access and edit the contents of the worksheet that you are working on. Invalid access to highly confidential information is strongly discouraged.
This method involves file manipulation so please secure a copy of your Excel file before doing the following steps. There is no guarantee that this approach will work with the current and future versions of Excel, but it’s worth a try.
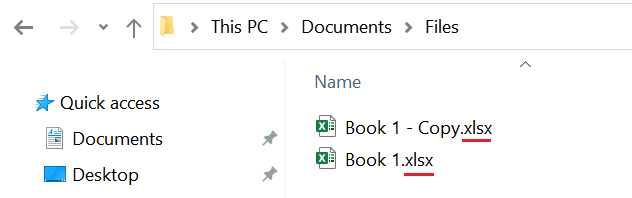
1. Open the folder where you have placed a copy of your Excel file.
2. On top of the Folder Explorer, click on View and tick the File name extensions checkbox.

3. Notice that the file extensions appear.
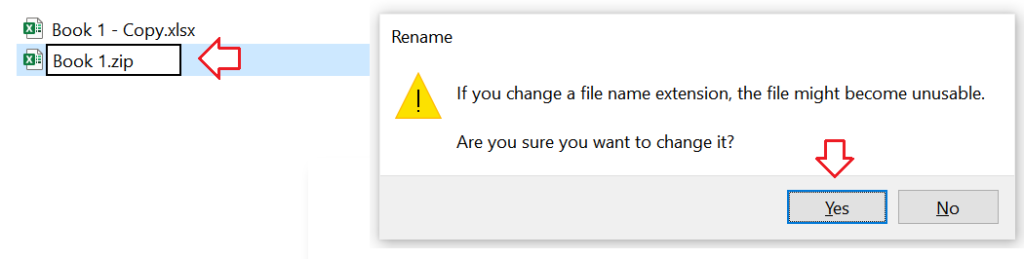
4. Change the file extension of your file from .xlsx to .zip.
You will see a prompt warning you of the effect of the changes that you have made.
Click Yes to continue.
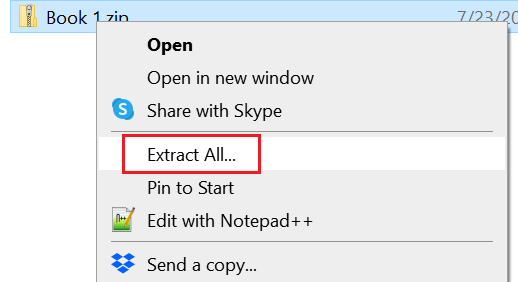
5. You should now see your Excel file converted into a zip file (as shown below).

6. Right-click on the zip file and select Extract All…
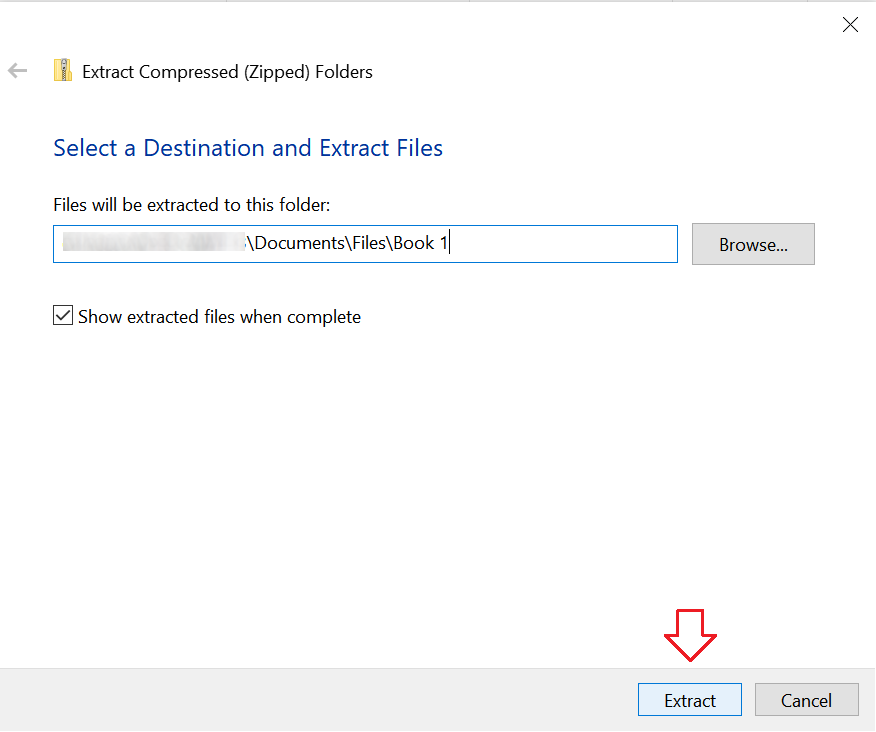
7. Another prompt will appear asking you for the destination of the extracted files. Click on the Extract button.
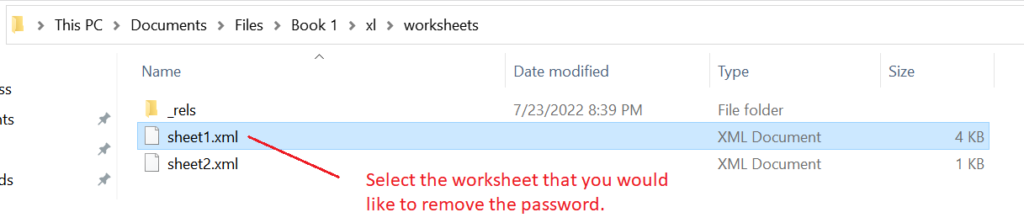
8. Open the extracted files and go to xl > worksheets.
Select the worksheet that you want the password to be removed from.
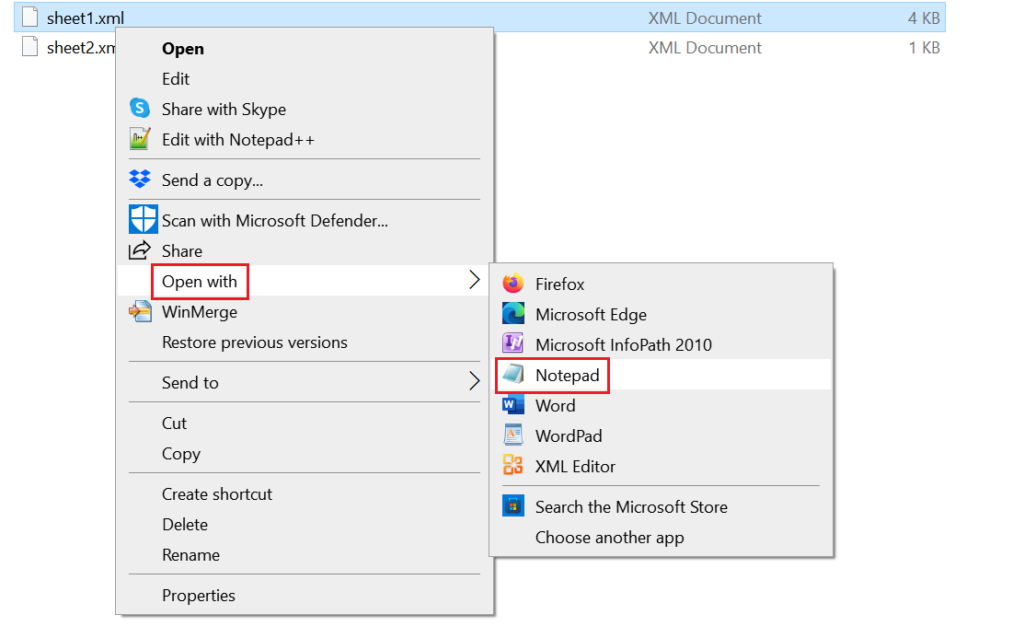
9. Open the file with a text editor (e.g., Notepad, WordPad, Word, etc.)
Right-click on it and select Open With >> (your desired text editor).
10. Once the text editor opens, look for the “sheetProtection” tag inside the file.
Press CTRL + F and type the word “sheetprotection” (without the double quotes).

11. Highlight the entire sheetProtection tag and delete it.
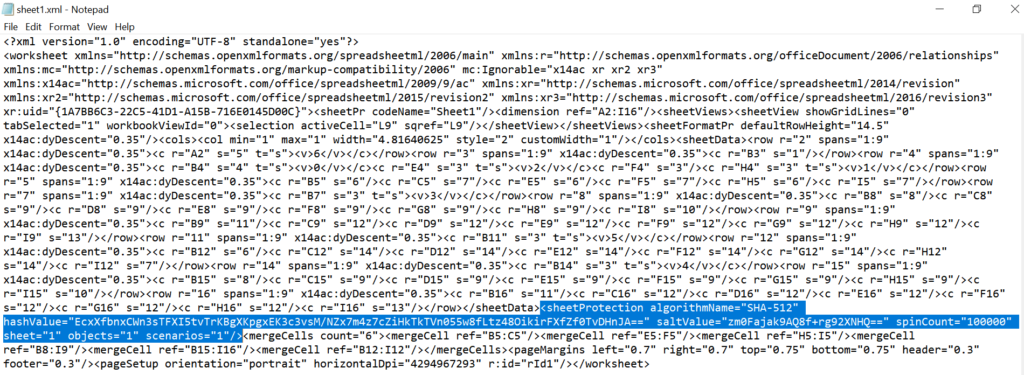
Start by highlighting the opening tag (<) before the word “sheetProtection”.
Drag the mouse until you see the closing tag (/>).
Once highlighted, press DEL to delete it.
12. Save the changes to the XML file and close the text editor.
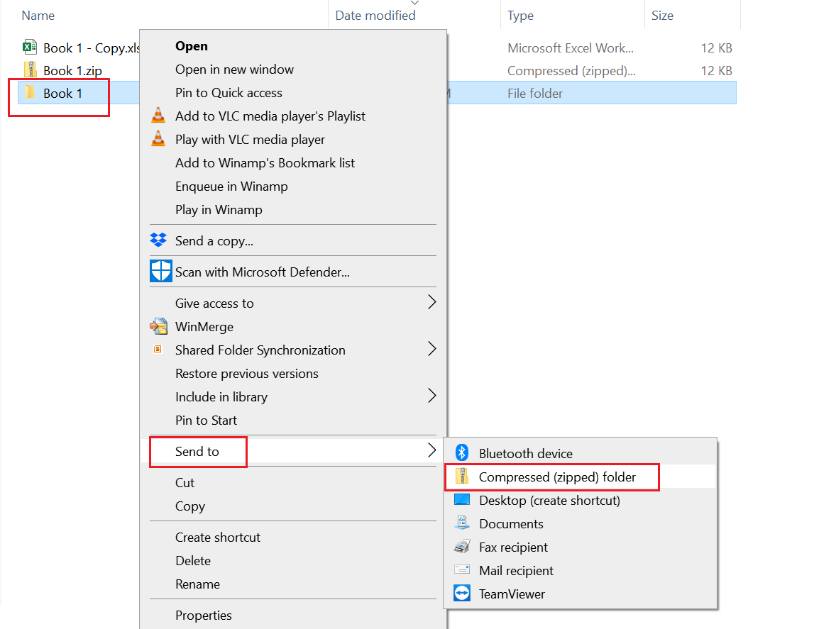
13. Re-zip the extracted files and change the file extension from .zip to .xlsx.
Differences in Restrictions for Password Protection in Excel
Excel provides different types of data protection depending on where you add the password. Data restrictions are different when you add the password in an Excel file, in a Workbook, and in a Worksheet.
Hopefully, this will give you an idea if there is a real need for you to unprotect the Workbook or the Worksheet for the changes that you intend to apply.
File Protection
When opening a password-encrypted file, you have no choice but to enter the password. You cannot open it and view its contents without the password. We usually apply this type of protection to files containing highly confidential data.
Workbook Protection
When a Workbook is password-encrypted, you are free to view the contents and make some changes. Your only restriction is that you cannot add a new Worksheet, edit, delete or even rename the existing Worksheets unless you enter the correct password. In short, Workbook Protection prohibits unauthorized users from changing the Workbook structure.
Worksheet Protection
When a Worksheet is password-encrypted, the changes allowed within that particular worksheet are limited. Only selected cells are open for edits.
All cells are, by default, locked for editing. But you can unlock cells to enable regular users to edit them freely without the password. This restriction is helpful for worksheets that require user inputs.
If you are an authorized user and there is a need for you to update the contents of locked cells within the worksheet, then you will have to enter the password.
Conclusion
There are three types of protection that you can add in Excel — File Protection, Workbook Protection, and Worksheet Protection. Where you place the password determines how your data is protected and how restrictions are applied. Follow the steps above to add, change, or remove the passwords in your file.