Data sorting (or the process of arranging data based on a field or a set of fields) allows us to analyze data more effectively.
If you want to temporarily sort your data in a particular order but want to be able to revert to the original data arrangement anytime, you’re in the right place.
In this tutorial, I’ll show you ways to unsort or revert to the original data order in Excel.
Table of Contents
Revert to the Original Data by Undoing the Data Sort
If you have just applied data sorting to your data by dates (and have not closed the file yet), you can go back to the original data arrangement by simply undoing the steps.
To do so, just press CTRL + Z (or Command + Z for Mac).
You may need to do it a number of times until you see your data sorted back to its original state.
IMPORTANT:
- If you have performed other tasks in the file after data sorting, these actions will have to be undone too.
- Please note that by default, Excel only allows up to 16 actions that can be undone. If you have done more than 16 actions post-data sorting, then this method may not work.
- You may need to find a way to acquire a copy of the data in its original arrangement or manually re-arrange the data. Once you do so, you can refer to the succeeding methods to revert to the original order anytime.
PRO TIP:
If you want to view again the data sort that you have previously applied, you can press CTRL + Y to redo the steps.
Revert to the Original Data using a “Sort Order” Column
This method will work if you have not sorted your data yet – meaning it’s still in its original state.
1. Before applying any data sort, insert a new column next to your data.
We’ll name this helper column ‘Sort Order’.
If your data is on a table, the new column will automatically be added as part of the table (as shown below).
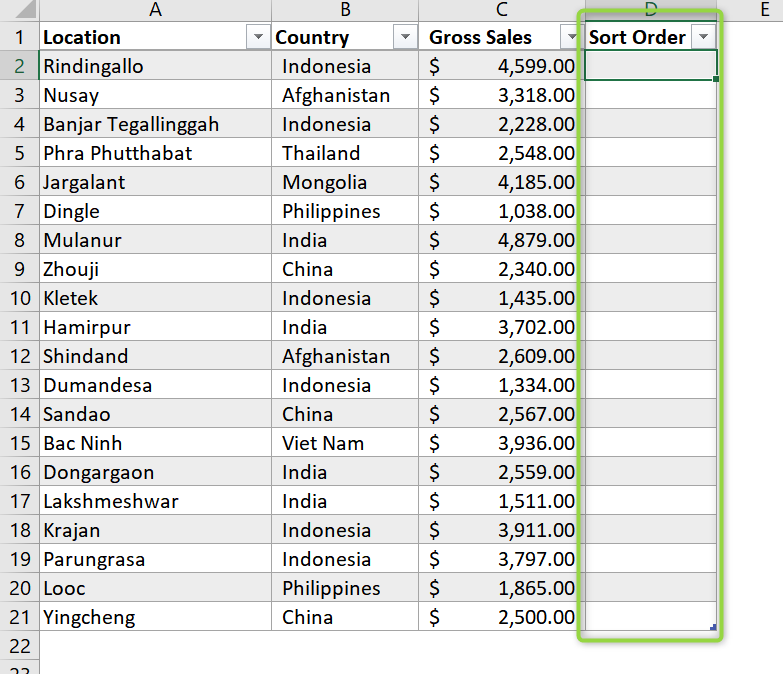
If not, you must reselect the entire data (including the new column) before sorting.
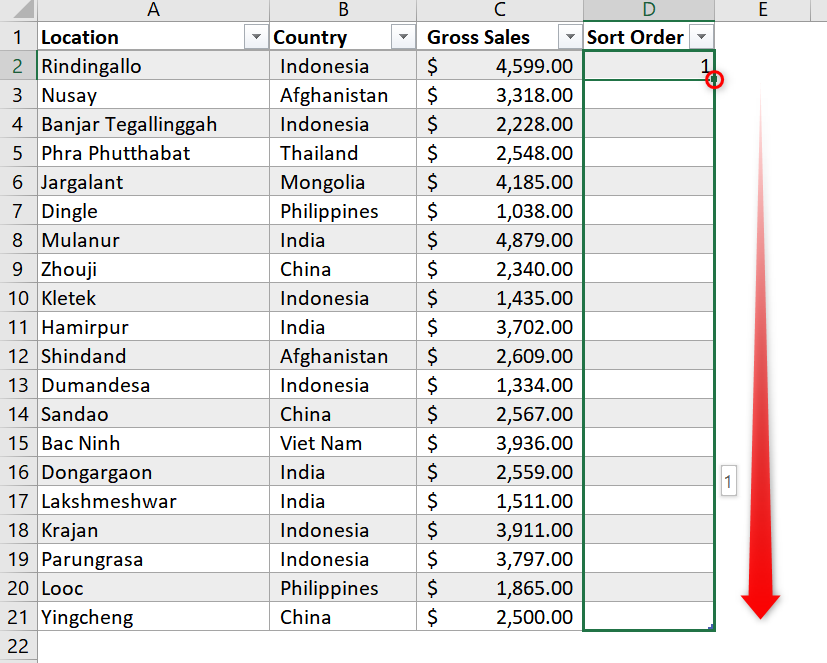
2. Next, we’ll add sequential numbers to this column – starting with 1.
By now, you may notice that we are adding this column to record the current order of the data rows.
Type ‘1’ in the first row and drag the fill handler down (up until the last row).
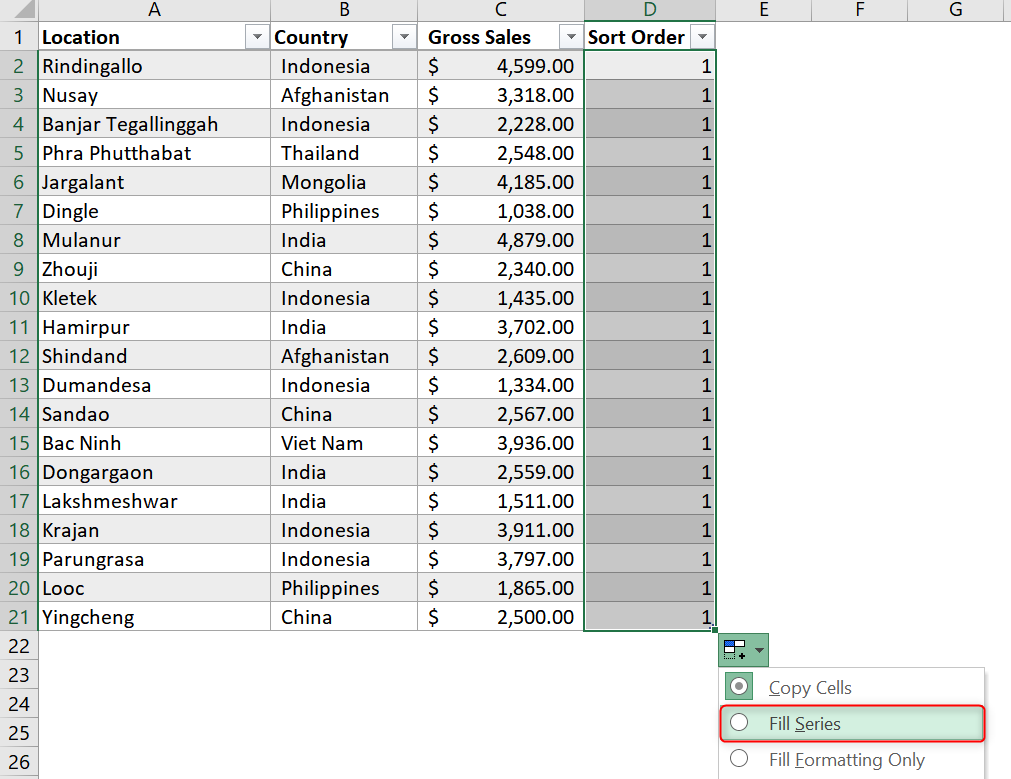
Notice that the column is now filled with 1’s.
Click on the Auto Fill Option that appears and select Fill Series.
The sequential numbers should now appear in the column.
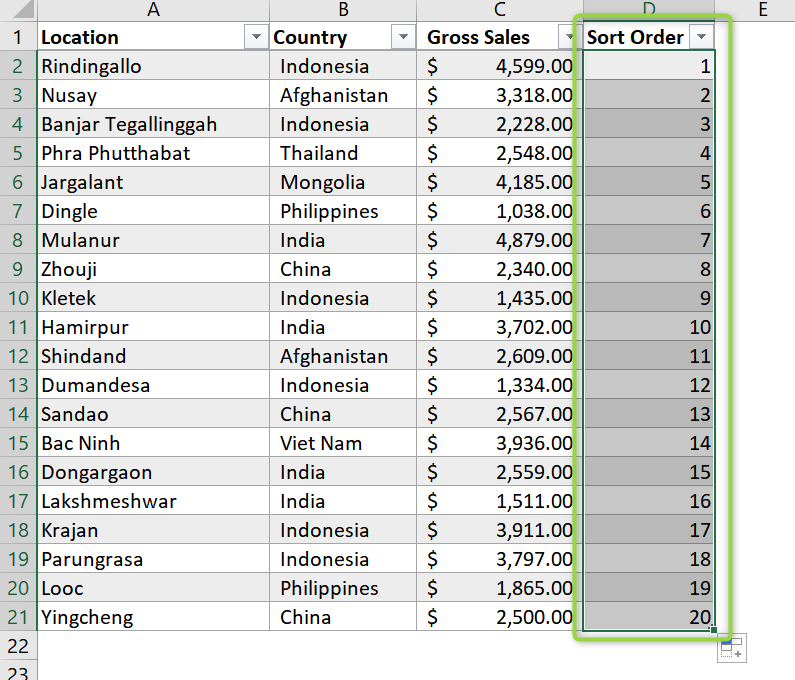
Now, you’re all set!
3. You can now continue sorting the data however you like – you can sort them alphabetically, sort them by last name, or in ascending or descending order based on the numbers.
4. Once done, you can revert to the original data order by simply sorting the data using the Sort Order column we have added. That’s it!
You can hide this column (or delete it) when you no longer need it.
Revert to the Original Data using a Data Backup
If you don’t like adding a new column to your dataset, you can do the most basic technique to easily revert to the original data – create a copy of the worksheet or the file prior to data sorting.
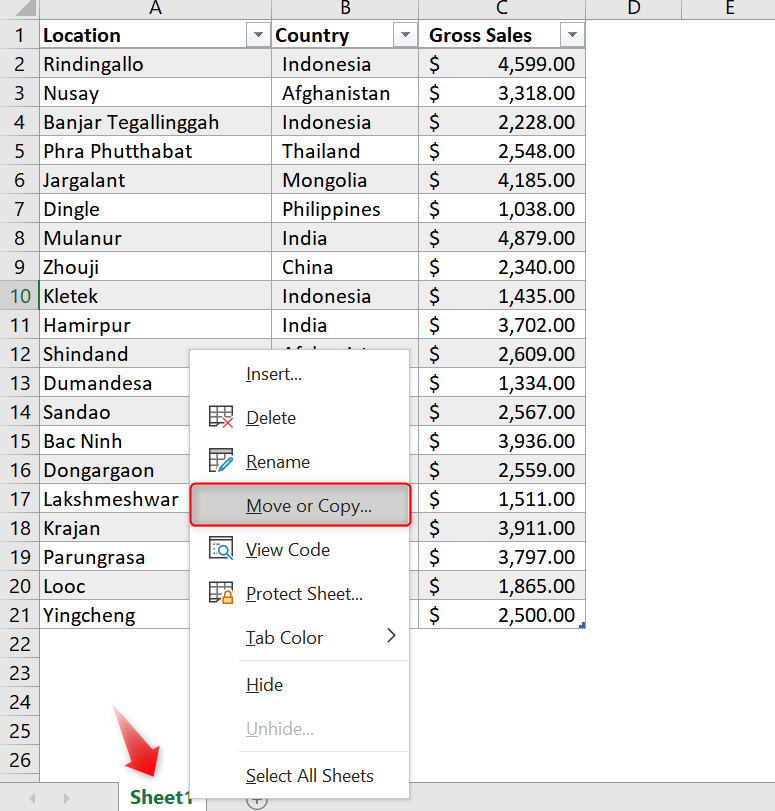
To create a copy of the worksheet:
1. Right-click on the sheet and select Move or Copy.
2. The Move or Copy menu will appear.
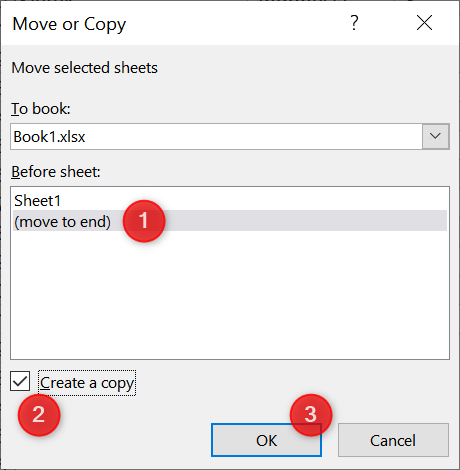
Select where you intend to insert the copied sheet (see Before sheet).
Tick the Create a copy textbox and click OK.
3. And that’s it! You have successfully created a copy of your dataset.
You can now proceed with applying your desired data sort.
IMPORTANT: Remember to apply the data sort on the duplicate copy (not the original one).
To create a copy of the file:
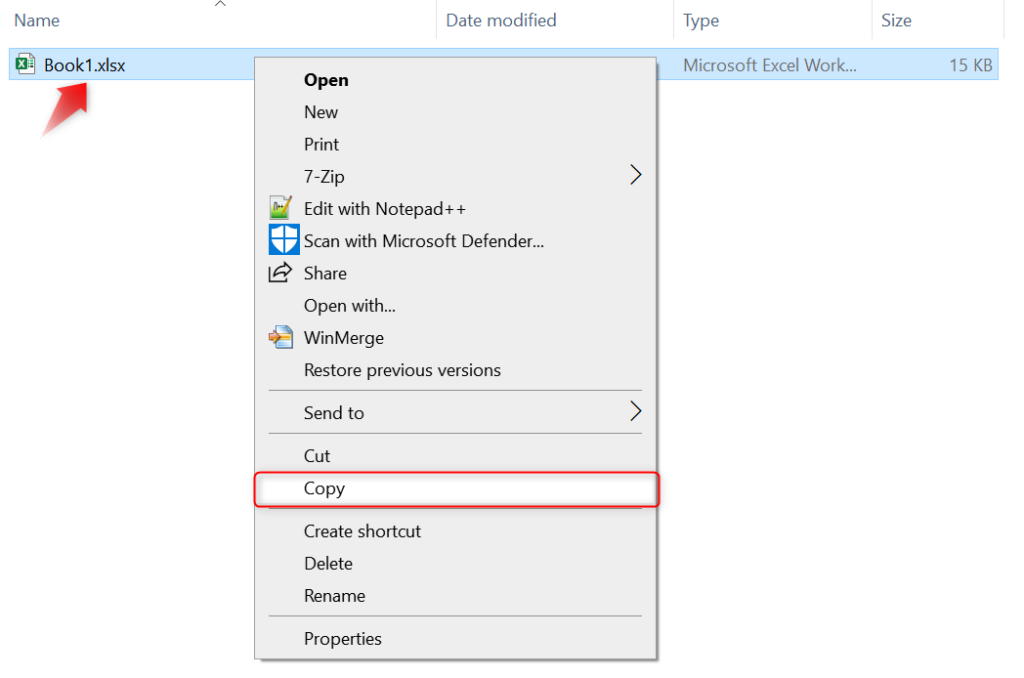
1. Close the workbook.
2. Right-click on the file and select Copy.
3. Paste it on the same folder (or on a different folder, if you like).
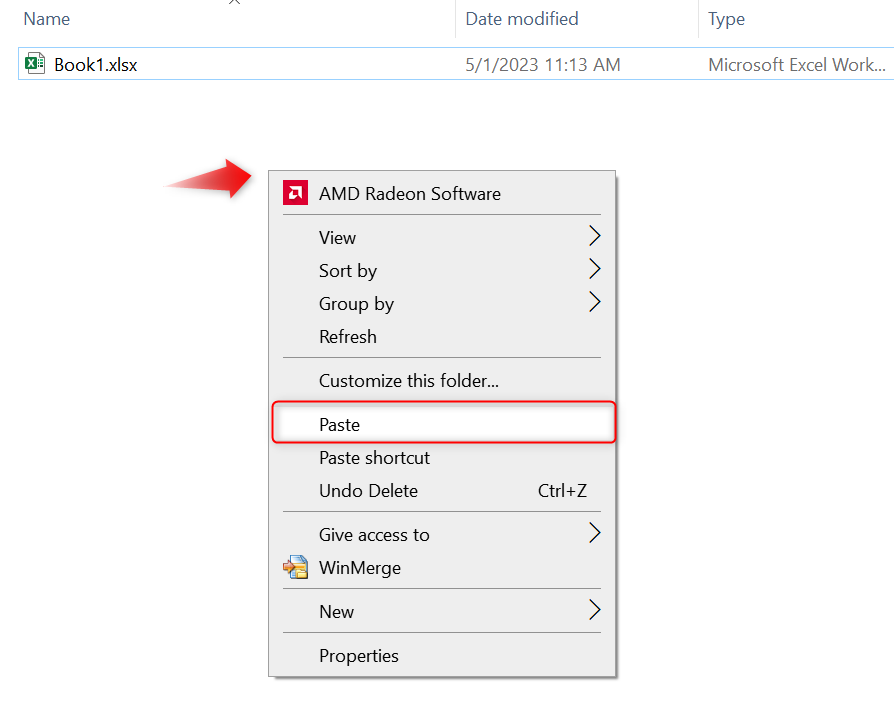
Right-click on a blank space inside the folder and select Paste.
You can rename the file if you want.
And that’s it! You can now proceed with applying your desired data sort.
Just remember to do it on the duplicate file, not on the original one.
Conclusion
Sorting data has many uses – it helps us understand, for example, which group performed better based on the numbers. We can also use it to quickly find records after sorting them alphabetically using custom autofill.
Whatever the purpose, there will be instances when we also need to go back to the original arrangement of the data. I hope the suggested methods above help you do so with ease.